
- In 1979 our dear family friend Nell Simala taught me how to make potica (po-teet-sa), a well-known commodity in my hometown, Pueblo Colorado, thanks to the local Solvenian community where potica is served at Christmas and other special occasions. Often, it was served with kolbasi. I remember enjoying the contrast of the savory kolbasi and the sweet potica. Back to the story about Nell. She told me to make the dough the night before, let it rise in the fridge overnight, and she would come over the next day to show me how to roll, stretch and fill the dough. Since then, I've made it alone...until November 2015 when my brother, Bob, invited our brother David and friends Lu (my high school chemistry lab partner) and Dave for a New York City potica-a-thon! This was altogether better than any of our chemistry adventures!
- When Nell arrived at our home all those years ago, I realized I had made a mistake: I doubled the butter in the dough and the filling. We used it anyway, and it was the best potica ever. Since then, we always double the butter! The butter in the recipe below is already doubled.
- The original recipe was in From an Adobe Oven to a Microwave Range, published by the Service League of Pueblo.

Rolling potica with Nell. This one had poppy seed filling - Today you can find potica sold online. In fact, potica was featured on the Advanced Dough episode of The Great British Baking Show even if they call it povitica. Their recipe has a chocolate filling and considerably less butter in the dough.
- Speaking of filling, we always run out. In 2015, we used canned poppy seed filling for the last third of the dough (2 cans, I believe). In this recipe I increased the filling so I would not run out.
- The original filling called for sugar and honey; we use only sugar. The original recipe called for condensed milk; per Nell's instructions, I use evaporated milk.
- It's a good idea to have a clean sheet dedicated to this project.
- Potica is one of those foods that takes on a new and wonderful flavor on the second day. In other words, try to not eat it all the first day. It's worth waiting for that flavor to develop even if that's what makes it addictive!

 |
| Spreading the filling with Lu and Dave. |
½ cup warm water
3 packages dry yeast
8-10 cups sifted flour (my notes say I used 8.5 cups)
¾ cup sugar
1½ teaspoons salt
1 pint warm milk
1½ cups butter, melted (salted or unsalted)
3 well-beaten eggs
 |
| Rolling with Lu. |
3 pounds ground nuts
4½ cups sugar
13-ounce can of evaporated milk
½ cup milk
1½ cups (3 sticks) butter
1½ teaspoons cinnamon
5 eggs, well-beaten
Glaze
1 egg, beaten
Mix Dough
- Mix the water and yeast in a small bowl.
- Mix the sugar, salt and flour in a big bowl. My notes say I used 8.5 cups flour.
- In a separate bowl, mix the milk, eggs, yeast, and half the butter. Add the dry ingredients.
- Knead the dough dipping your hands in the other half of the butter until it's all added. That will be 10 or more minutes of kneading.
- Let rise in a warm place for 1 hour or overnight in the refrigerator.
 |
| Spreading the filling with Bob. |
- Mix all the filling ingredients except for the eggs.
- Warm the filling. Set aside to cool while you shape the dough.
- After the filling cools, add the eggs.
- If you can, expand your table and cover it with a clean sheet. Flour the sheet lightly.
- Cut the dough into thirds. Begin rolling one-third of the dough with a rolling pin.
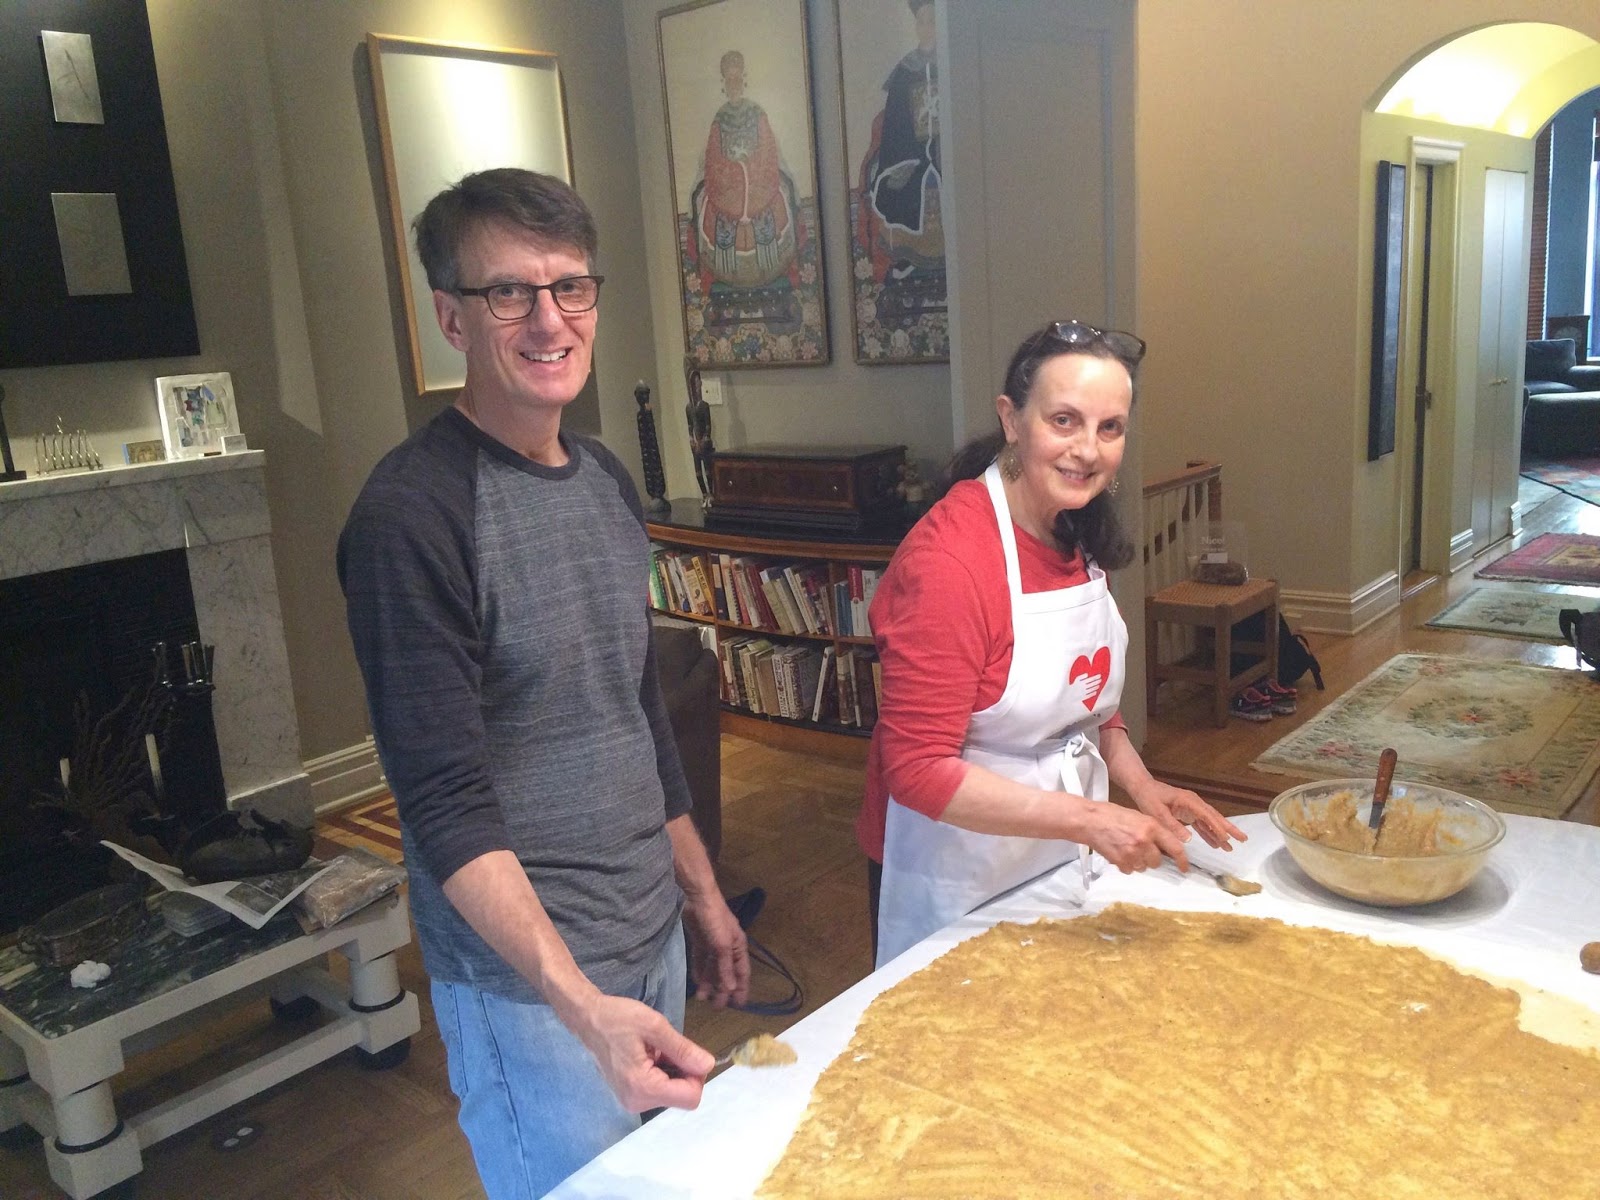
- Next stretch the dough by pulling it across the back of your hands. This is easier to do with two people on opposite sides of the table. The idea is to get the dough as thin as possible without tearing it, although most tears will never show. Some people never pull the dough; they prefer to only roll the dough.
- Remember to add the eggs to the filling.
- Spread one-third of the filling onto the dough. Roll from one end. Lu taught me to roll tightly to avoid air gaps.
- Place on a greased pan with the open seam underneath.
- The potica can be straight like a strudel or curled into a circle or backwards "e." This time we made a modified backwards "s" and it worked!
- Some people bake potica in a loaf pan. I've never used a loaf pan, but if you do, line the pan with greased parchment paper. I would use extra long sheets of parchment paper so you have something to grab when you lift the potica out of the pan.
- Roll, fill, and shape the rest of the dough.


- Brush the glaze over the dough.
- Let rise 30 minutes.
- Bake 1 hour at 350°.

1 comment:
Thank you for this post! I have been hunting for a decent potica recipe all morning, and yours fits the bill!
Povitica is the folded over, loaf pan loaves.
I was hunting the larger version.
Your writing is wonderfully easy to follow. Thank you again!!!
Post a Comment